Yoast SEO is a WordPress SEO plugin. Learn how to improve website SEO using Yoast SEO plugin. Get SEO optimization using free SEO tools.Fully Optimize Your Website with Yoast SEO plugin
Yoast SEO is a very popular WordPress plugin for SEO optimization of WrodPress websties. SEO optimization might be a complex process, but SEO tools like Yoast SEO does simplify the process. It’s important for site owners to use SEO tools to improve their searc engine visibility.
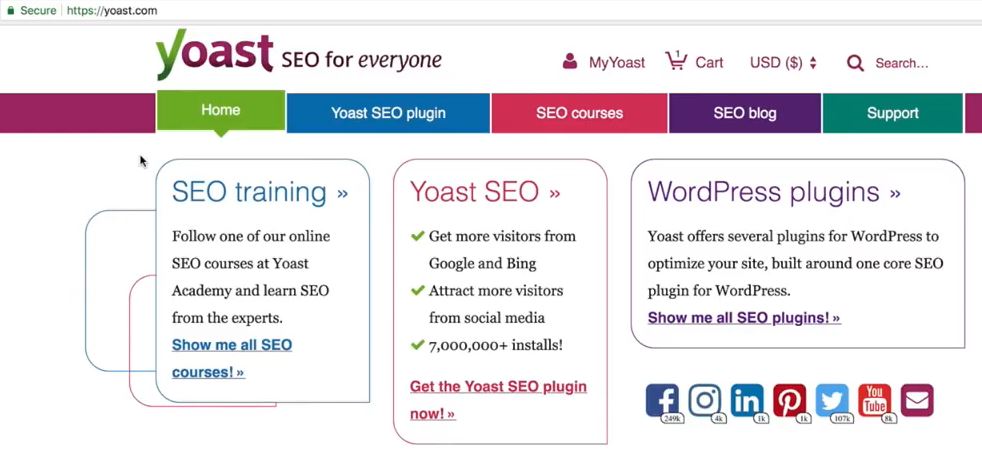
How to install Yoast SEO plugin
The steps of installing Yoast SEO plugin is same as that of any WordPress plugin.
1. From your WordPress dashboard, click Plugins > Add New
2. Type “yoast” in the search box to search for Yoast SEO plugin.

3. Click on Install Now button. Once installed, click Activate to activate the plugin.
How to setup Yoast SEO WordPress plugin
As soon as you activate the Yoast SEO plugin, the Yoast SEO installation wizard opens up.
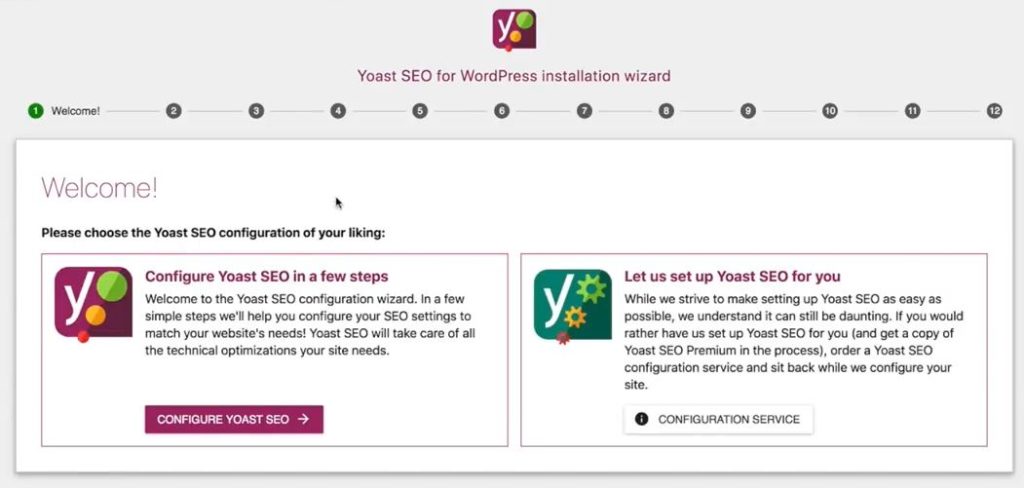
If the Yoast SEO installation wizard does not pop up, then from WordPress dashboard go to Yoast section and click Yoast Installation wizard.
Next, follow the below critical steps for setting up the Yoast SEO plugin for WordPress to make the plugin work best for your website.
Fully Optimize WordPress website using Yoast SEO
Step 1: Configure Yoast SEO
The wizard will walk you through the configure steps. Its important that you read each step that the wizard walks you through. Doing this will make you better informed about the changes the wizard bring to your site. In first step the wizard explains that the Yoast SEO will take of all technical configuration your site needs. Press the Configure Yoast SEO button.
Step 2: Search engine indexing
This provides two options. If you want your site to submitted for search engine indexing, then select Option A else select Option B. If you select Option A, Yoast SEO will submit your website to Google, Yahoo and Bing for indexing purpose.
It is a wise idea not to hurry in submitting your website for indexing purpose. If your website is still under construction, then do complete your site before you submit it for search engine indexing.
Step 3: Let Yoast SEO know what the site is all about
Select the appropriate option if it is blog, or online shop or a news channel or a corporate website.
Step 4: Company or person
This is an important step. It says that this information will be used in Google Knowledge Graph Card, the big block of information you see on the right side of the search results.
If your site represents a company, select the company option. You also get the option to upload company image. This information will be submitted to Google’s Knowledge Graph Card. If the site does not represent any company, then it is a personal site. Choose your option appropriately.
Step 5: Enter URLs of Social profiles
Yoast SEO will submit this information to search engines. A good social media presence does bring credibility to sites, there by increasing their search engine visibility.
You can enter URL for Facebook, Twitter Username, Instagram URL, LinkedIn URL, MySpace URL, YouTube URL, Google+ URL.
Step 6: Search Engine Visibility
Continue with the default setting in this step. This ensures that you want to make all major section of your site like pages, posts, mega menu visible to search engine.
Step 7: Multiple authors
If your site have multiple authors, select yes else select no. Its recommended to select no.
It says that if your choose no, your author archives will be deactivated to prevent duplicate content issue. Anything, that prevents your site site from being branded as having duplicate content is a good to have option.
Step 8: Google Search Console authorization
In this step Yoast SEO integrated with Google Search Console. Its better to do this step manually and hence would recommend to move ahead by clicking next.
Otherwise, you can click Authenticate with Google and click Next.
Step 9: Title settings
This step allows you to change the name of your site. Also, you can choose the separator that your will d like to shoe between the site name and the post title. This will be displayed by the search engine, hence choose one that takes up the least space.

Step 10: Sign up for Yoast SEO newsletter
Step 11: Prompts you to upgrade to a premium Yoast SEO.
Step 12: End of configuration
Here you can find the useful video of how to work with Yoast SEO metabox on posts and pages. Its a must watch, to know how to use the tool.
Yoast SEO features tab
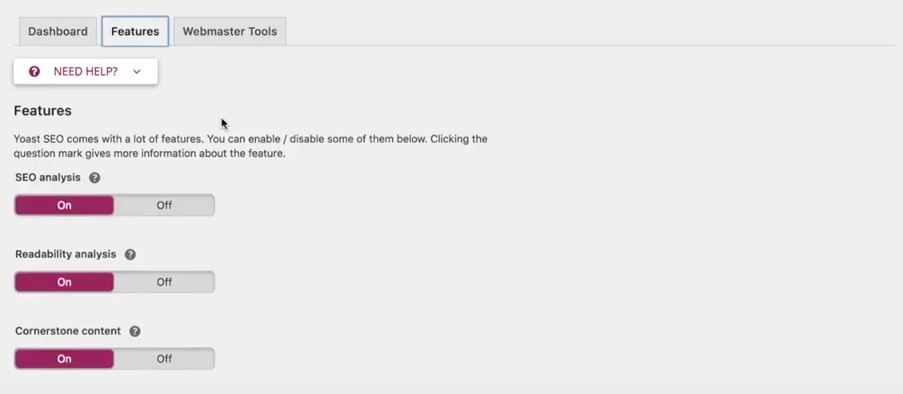
Navigate to Yoast SEO features tab. Make sure that all button under this tab are active. This will enable to improve your sites search engine visibility.
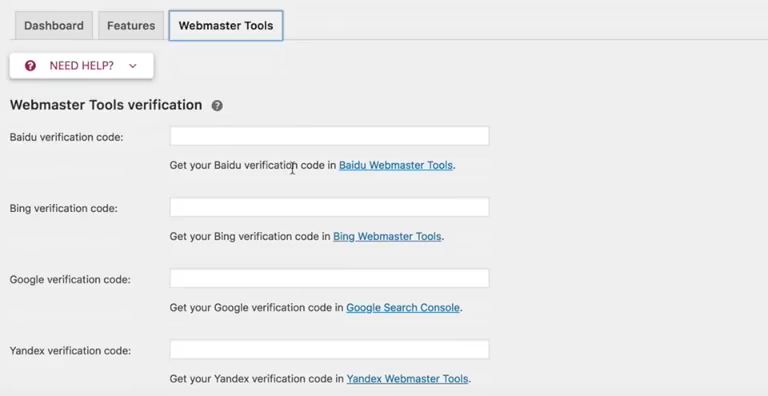
Yoast SEO Webmaster Tools Verification
Yoast SEO encourages you to get your site verified with Google, Bing, Baidu and Yandex search engine. Search engines crawl verified websites on a regular basis, hence this is a very important step for SEO optimization. Getting your site verified with all four is the best thing that you can do, but if you do not want all four then at least you should get your site verified with Google and Bing.
Go to Google Webmasters website. Login in with your Google account. Add your site as a property. Provide your site name and press Add a Property button.

Click on Google Search Console link to verify your website. It will take you to Google Webmaster central page. There are various ways to get your site verified.
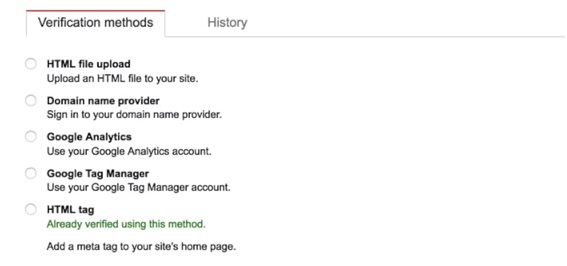
Select radio button HTML tag. Copy the code and paste it in Google verification code field in Yoast SEO and click Save changes.

After saving the code in Yoast SEO tool, click Verify in Webmaster Central page. Your site gets verified by Google.
You need to follow similar steps to get your site verified by Bing. You will need to sign in with Bing Webmaster Tool if you do not have a Bing account.
Yoast SEO tool search appearance customization
Content Types tab
This is an important customization. This will ensure how search engines are going to display your site on the search engine page. A proper customization of this section will lead to more clicks to your site from the search engine page.
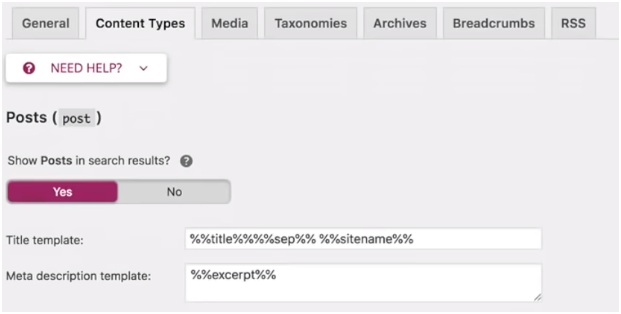
In Yoast SEO click Search appearance and go to Content Types tab.
SEO experts follow title-separator- site name approach for Seach appearance of their posts. You should change it to the same formula.
In the Title template field make the required changes as shown in the image below. In the Meta description template provide excerpt. Make sure to make your excerpt rich with keywords related to your posts.
Do the same for pages as well and click Save Changes button at the bottom.
Taxonomies tab
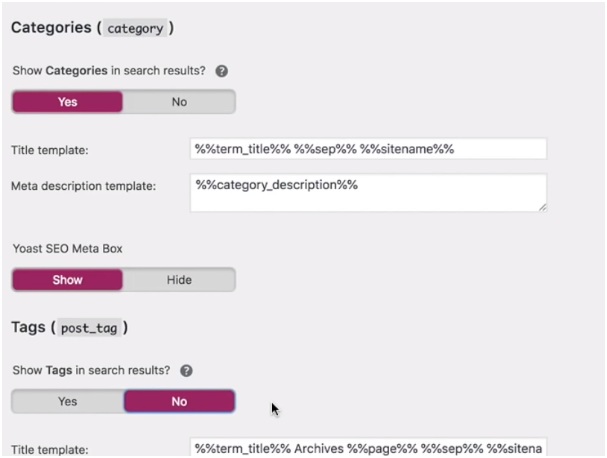
Make changes to Categories Template title field as shown in below image. Its better if you restrict search engines from showing Tags as it may cause duplicate content issue. Select No button for Tags. Select Disabled button for format as well.
Archives tab
Keep archive settings as disabled. Archive may cause duplicate content issue, hence its recommended to keep it away from search engine display.
Similarly, in Breadcrumbs tab, keep Breadcrumbs settings disabled.
Add your XML sitemap to Google
We will submit our sites sitemap to Google. Sitemap is a URL: yourdomainname/sitemap_index.xml
Go to Google webmaster, under crawl select Sitemaps.
Click AddTest Sitemap and enter sitemap_index.xml in the input field.

Optimize posts using Yoast SEO
Scroll down to the bottom of a post in edit mode. Yoast recommends the possible improvement that can be done in your post. Try to achieve as much as possible.
Click on Snippet Preview. You get the input field for SEO title. Provide an interesting and catchy title. This will get displayed in the Search engine search result page. Keep the title relevant to your content, else Google may ignore it and display a title relevant to your content.
Meta description with be your excerpt. Yoast will consider the settings %%excerpt%% that we had configured earlier.
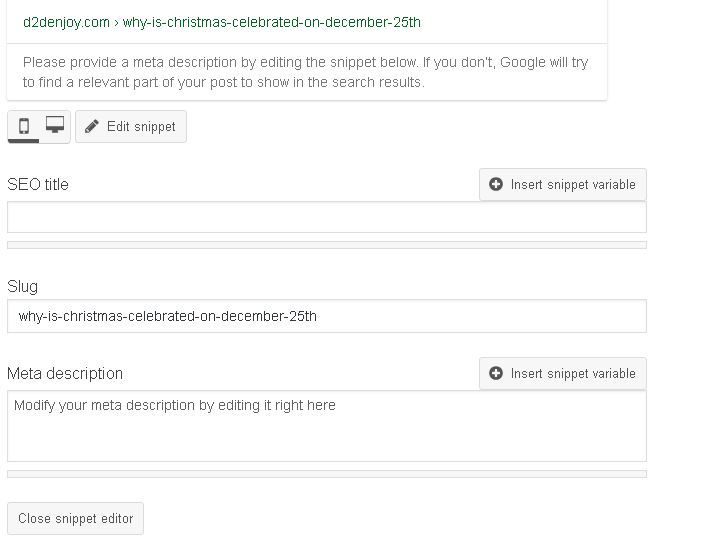
Provide a focus keyphrase. You should enter a relevant keyword. The free edition of Yoast SEO will take only one key word phrase but the premium can take up to five.

This article provides all the steps relevant to optimize SEO for your website. But any amount of SEO will not help if you do not have a good engaging content for your users. Goggle always looks for good content and that plays the most important role in your search engine rankings.
